Inviting users to your workspace does not automatically grant them access to the applications within your workspace. You must follow a few simple steps to add users to your applications.
This process is beneficial as it allows you to give specific access levels to different users based on the applications they will be working on.
For example, you can invite a team that manages a project to the application you created. In contrast, another team responsible for marketing can be invited to the application created for managing campaigns.
To add users to your application, follow these steps:
Step 1: Select the Application
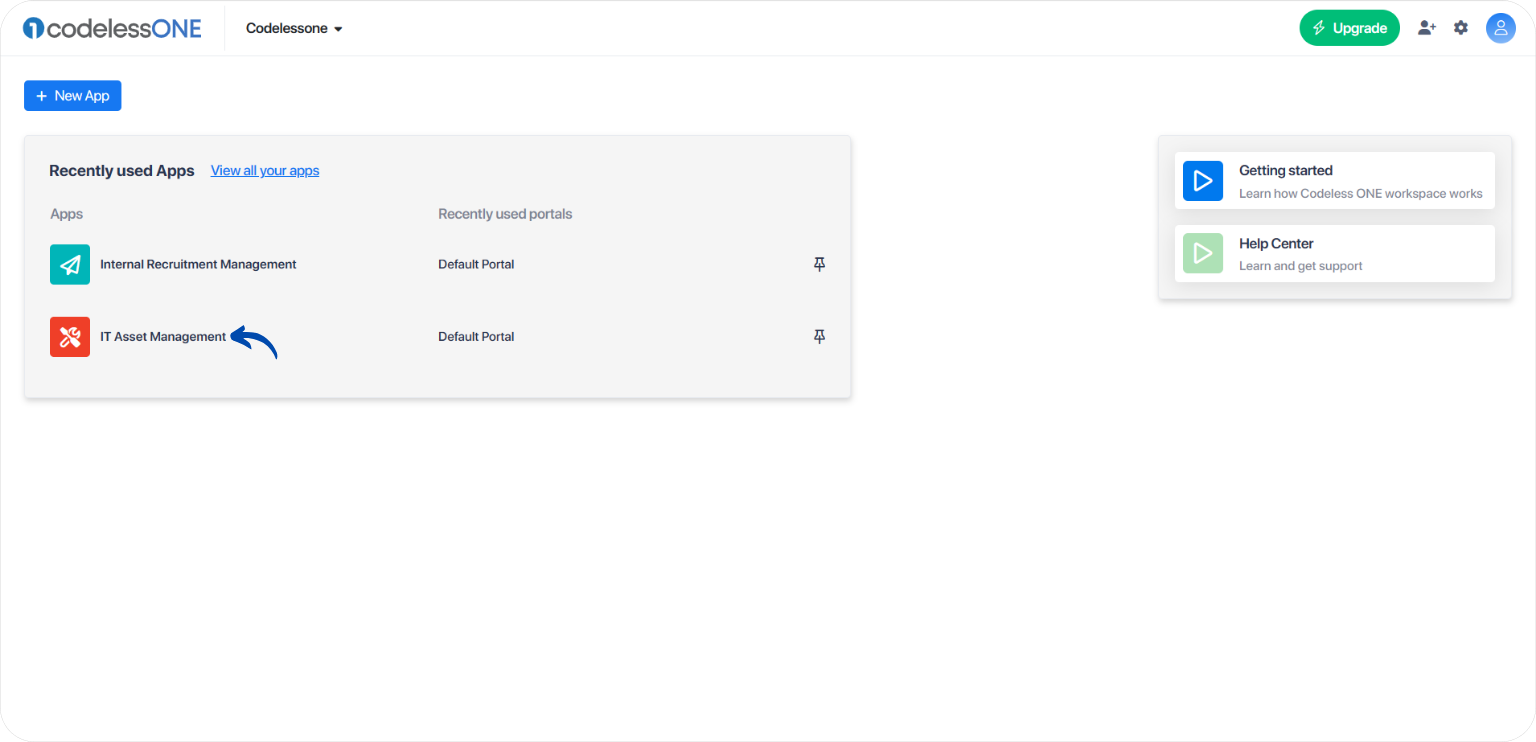
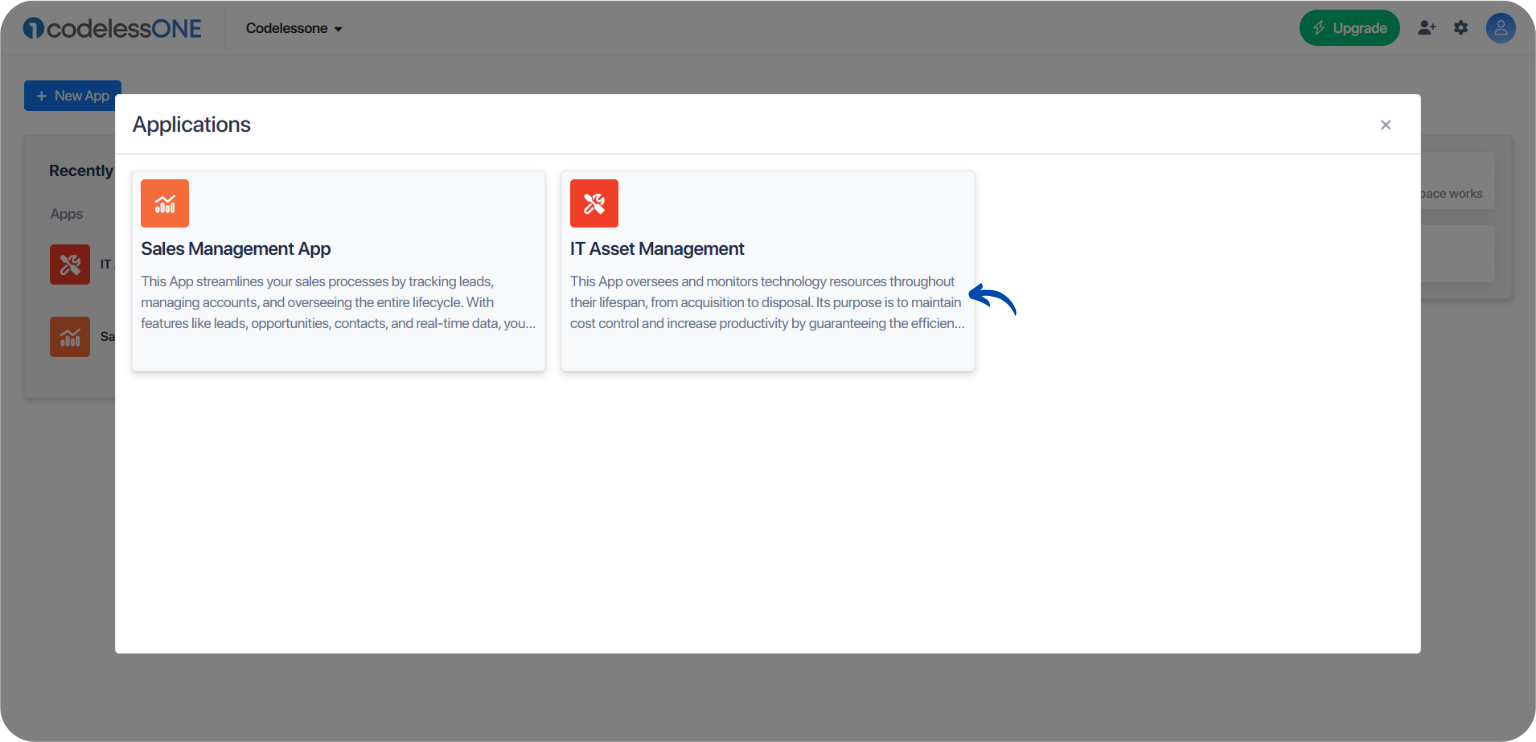
To add users to a specific application in your workspace, start by selecting the desired application.
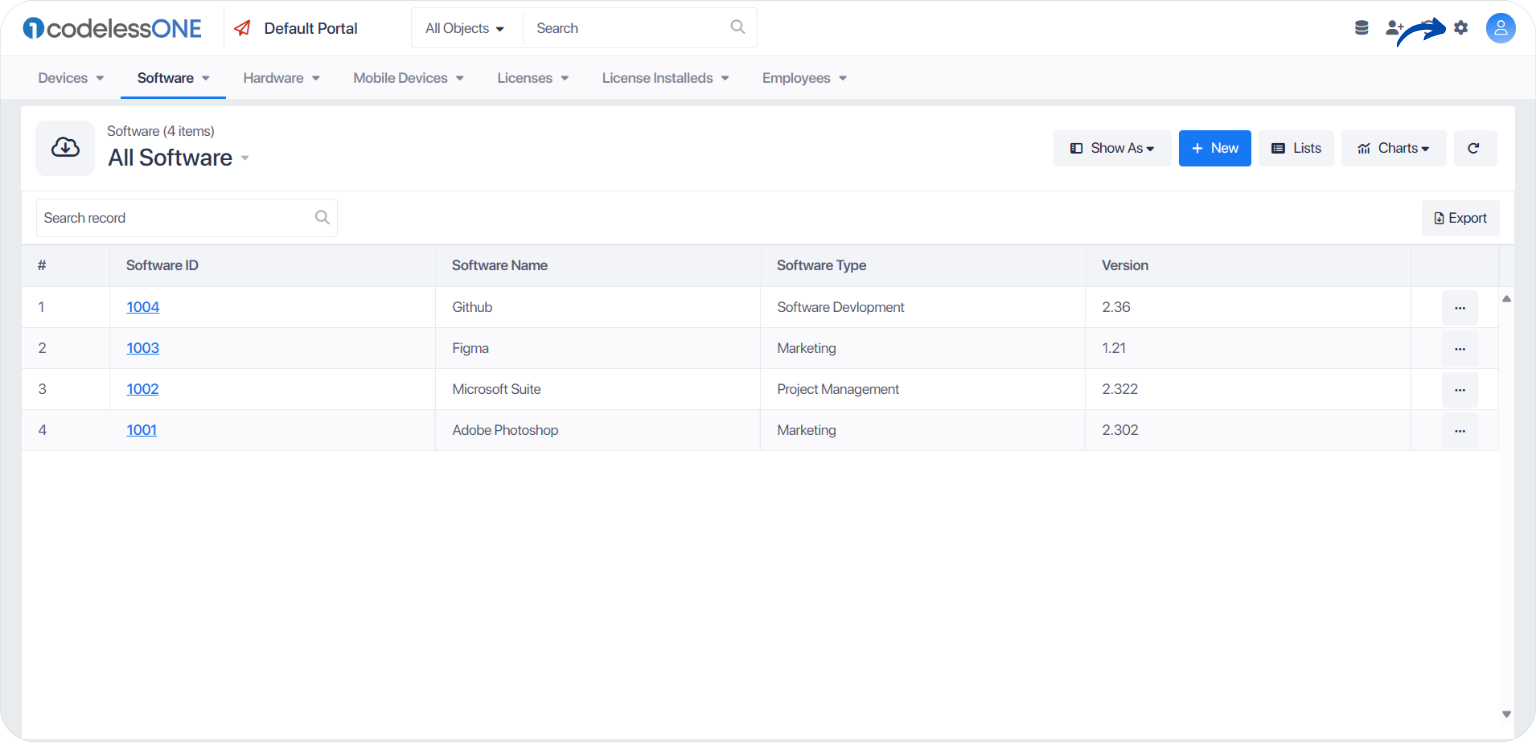
You can access the application settings button by navigating to the top banner of the selected application
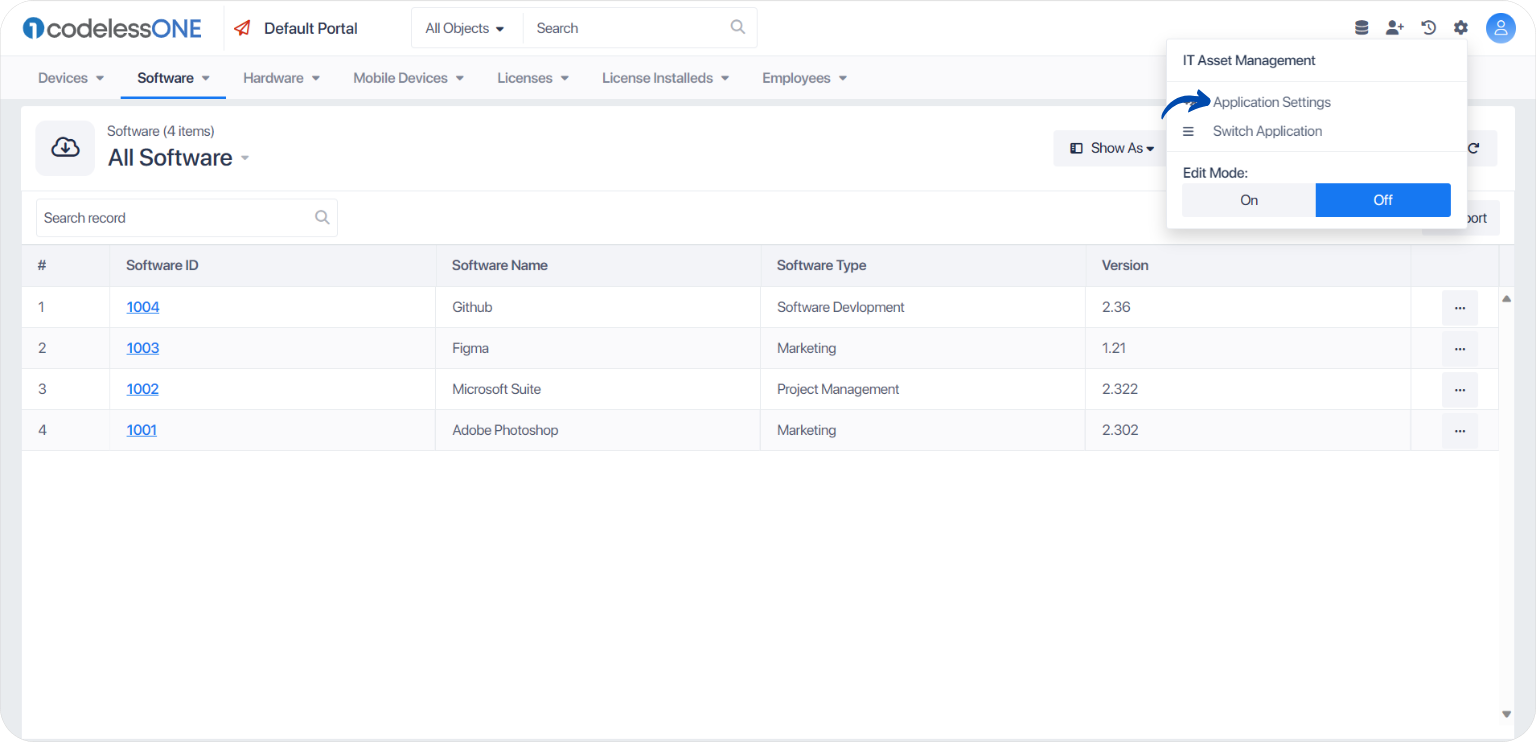
Once you click the button, you will see three options: Application Settings, Switch Application, and Release Information. Select the application settings option to direct you to the app settings page.
Step 2: App Users Tab
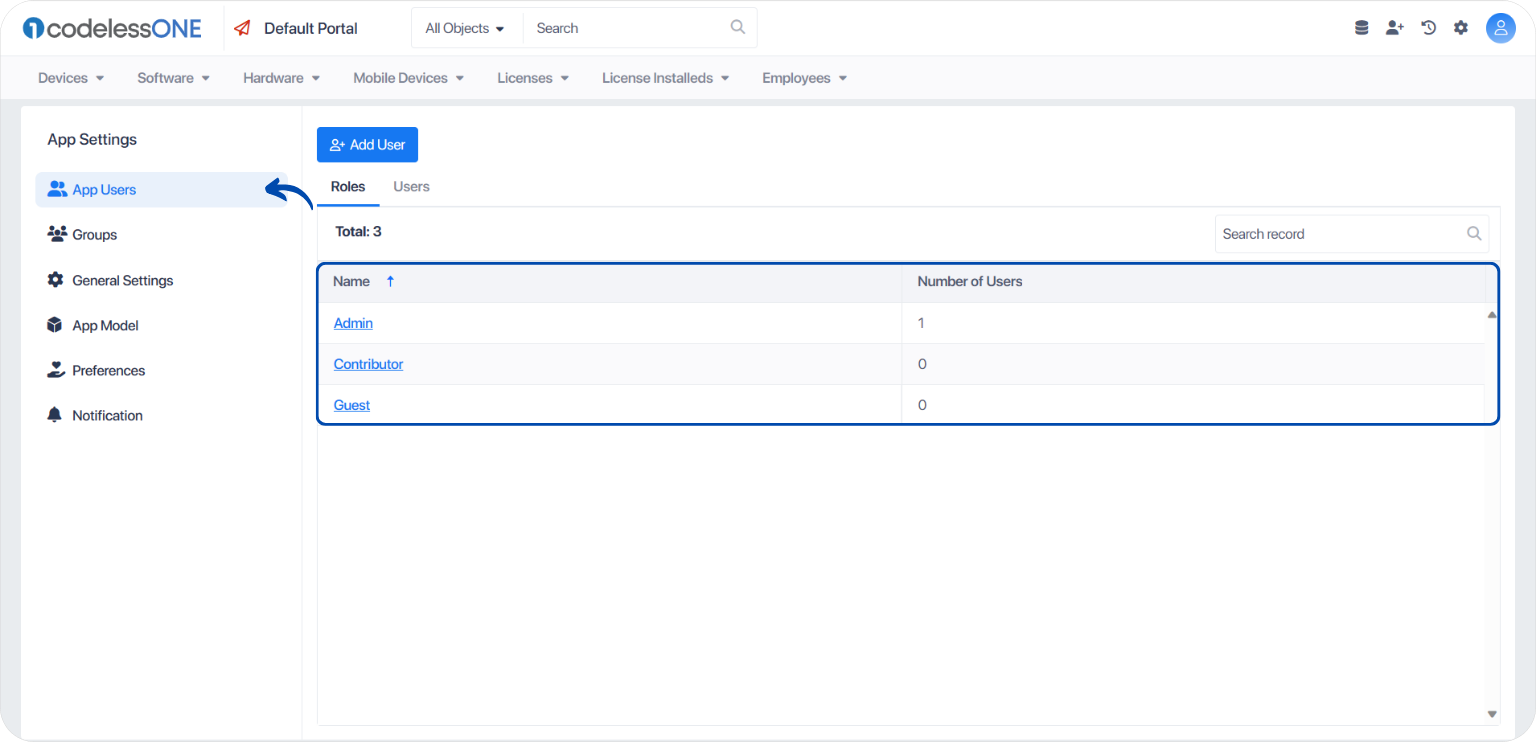
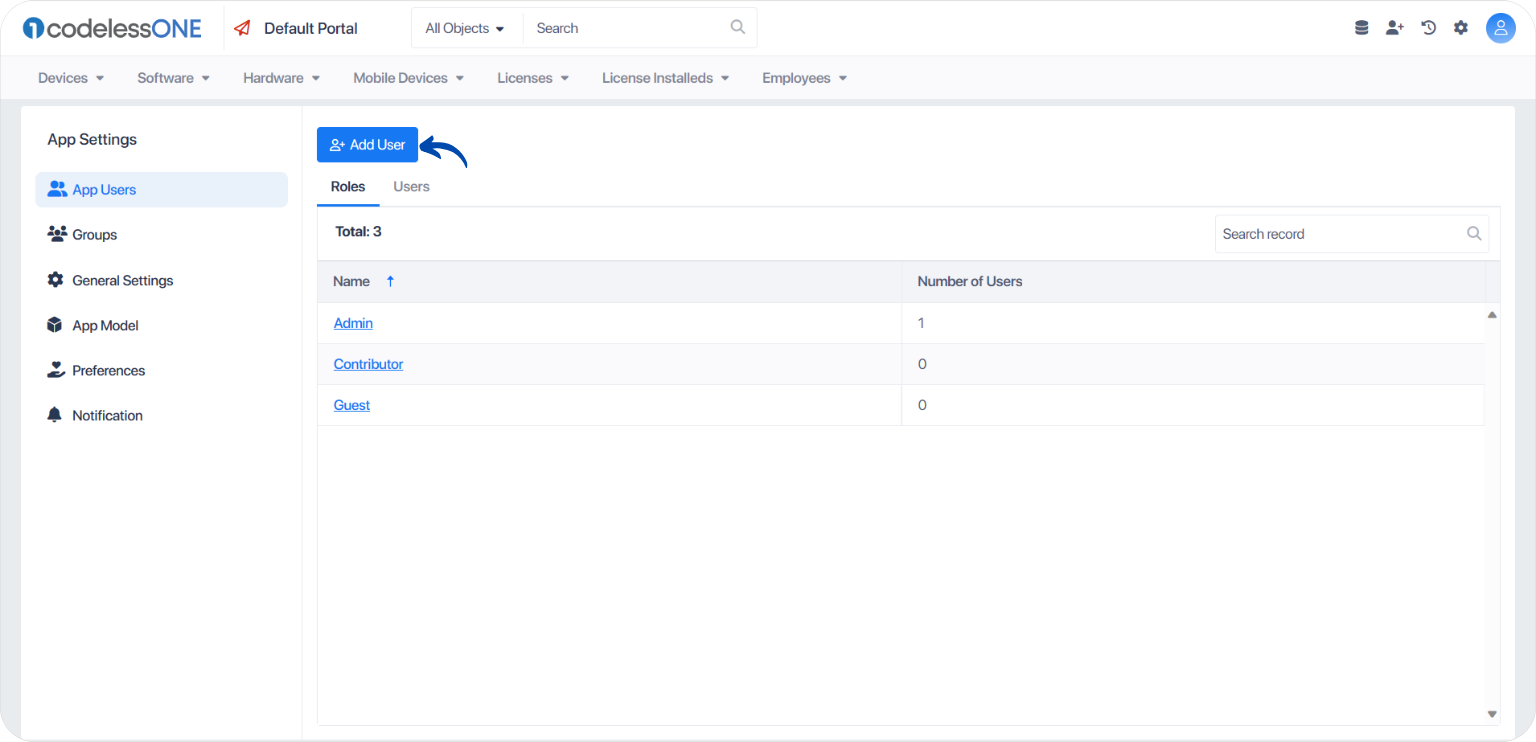
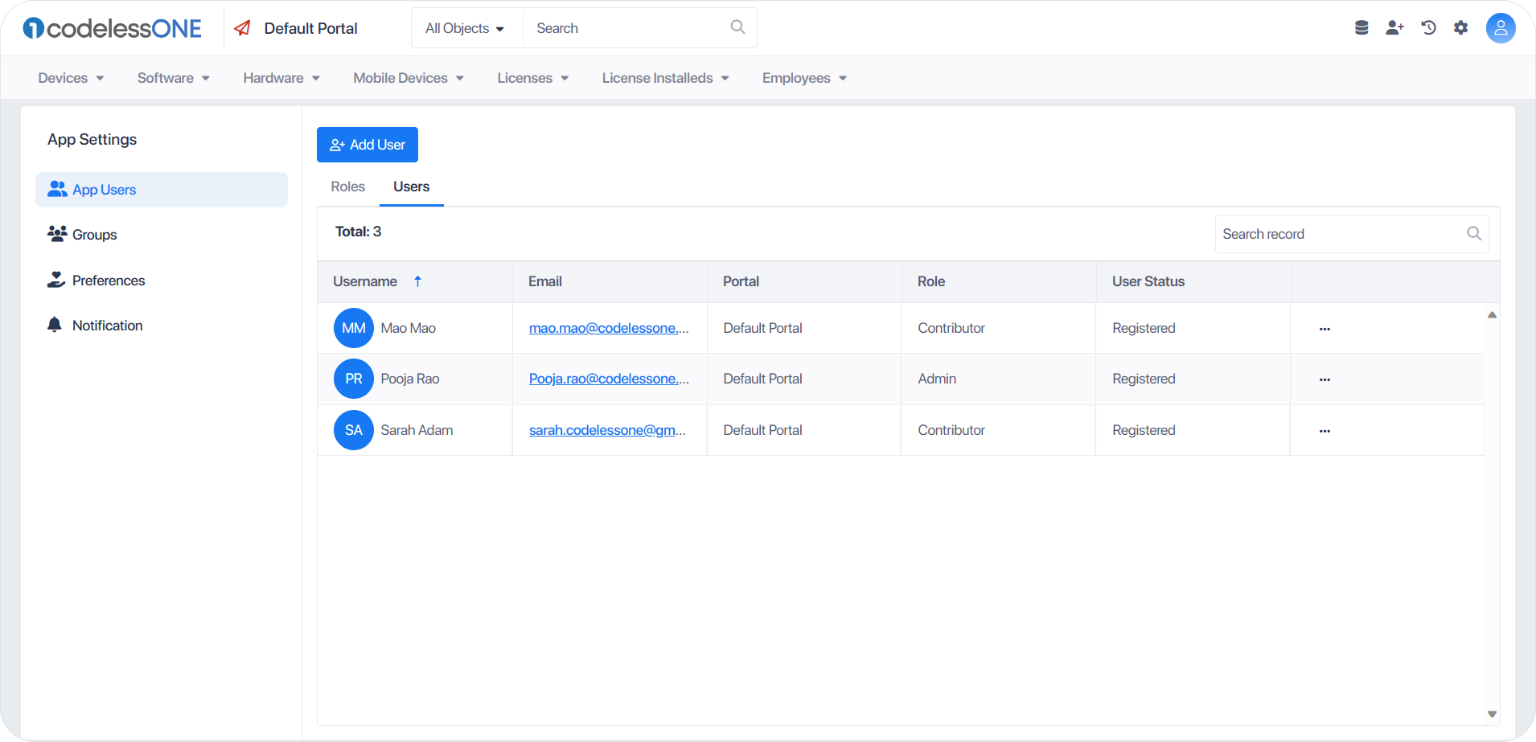
Upon accessing the App Settings page, the system automatically opens the App Users Tab. The system creates three default roles for each application: Admin, Contributor, and Guest.
You can set access rights for these roles under the App Model. Additionally, you can add new relevant roles to your application under the Roles tab. The option to add additional roles depends on your subscription plan.
Step 3: Add Users
Click the “+Add User” button to add users to your application.
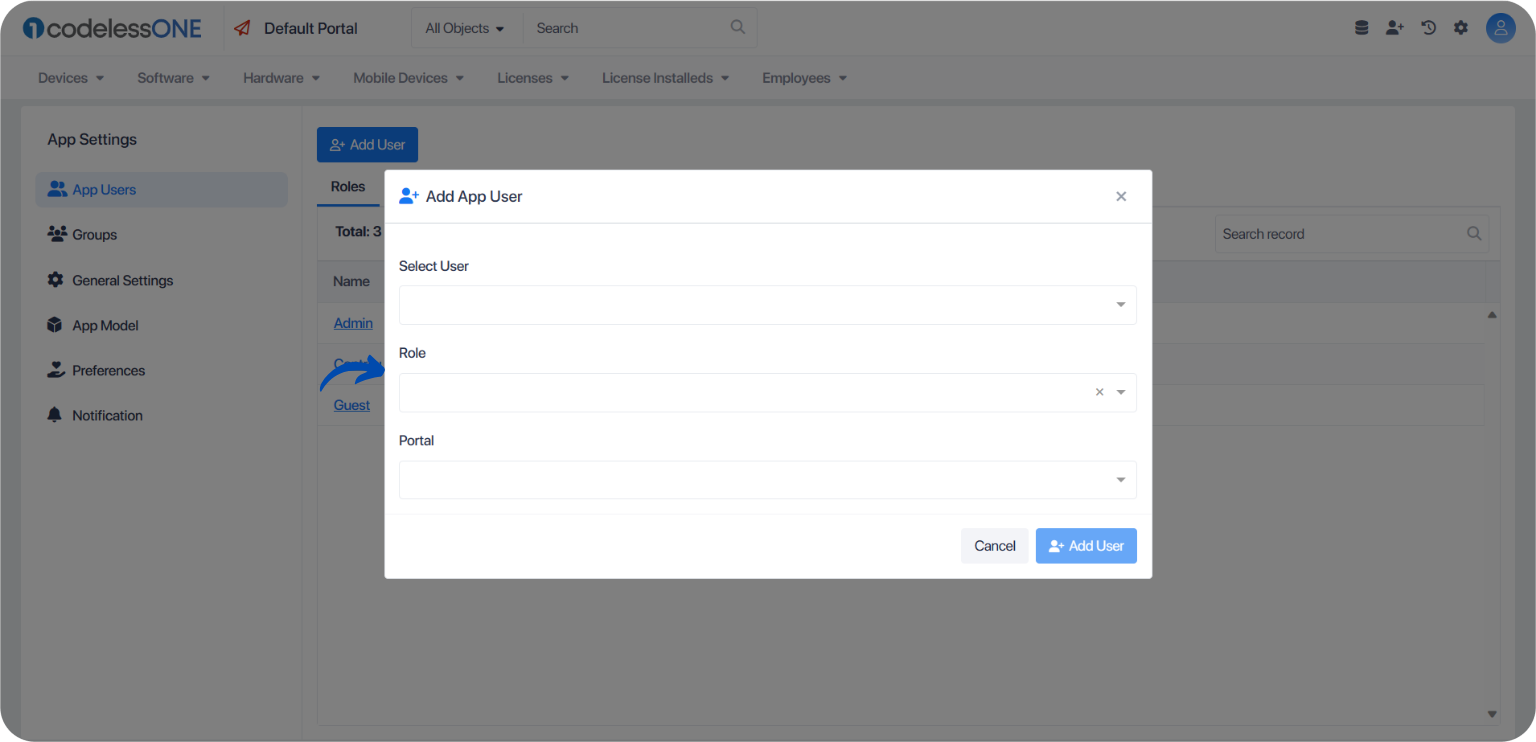
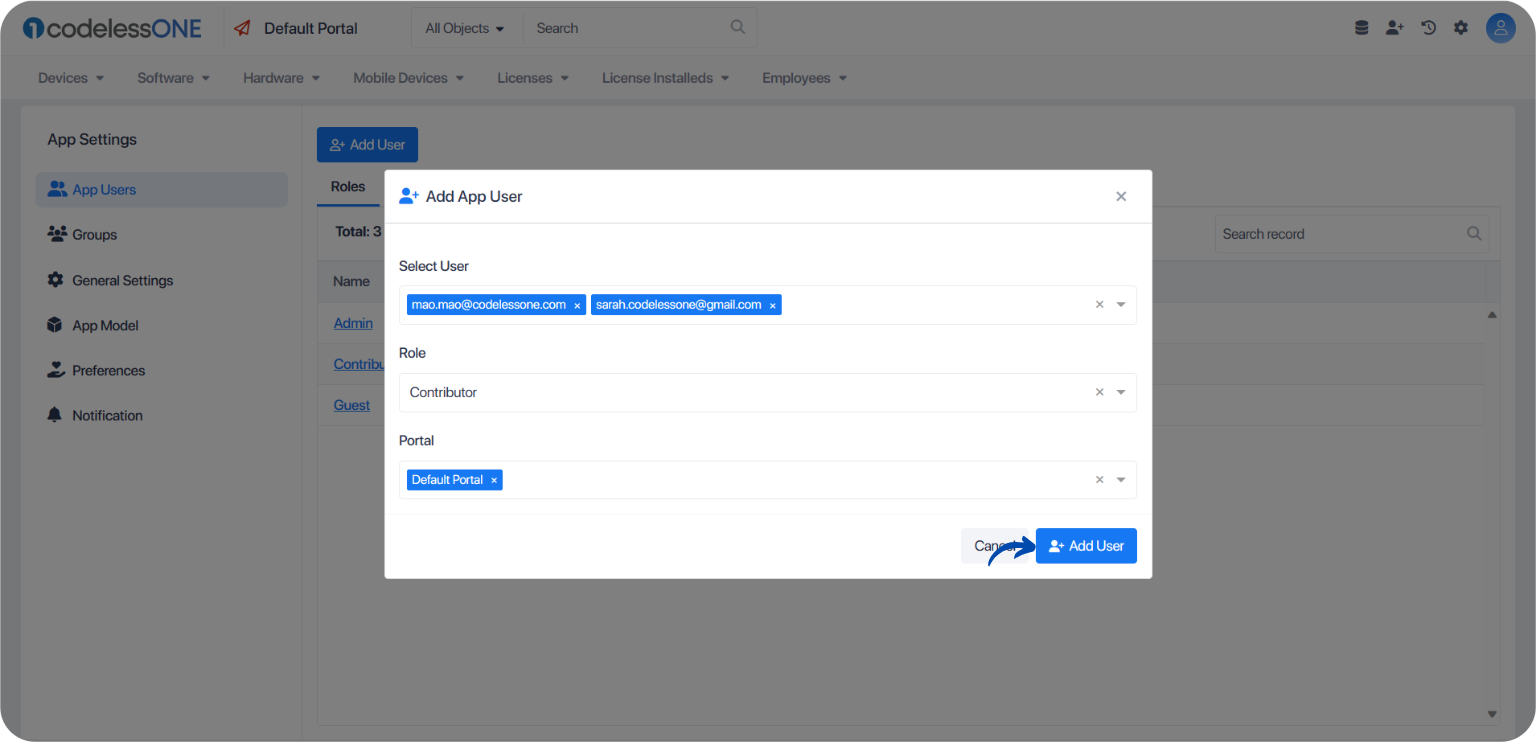
The system will display a pop-up form to add users to the app. There are three fields to select in the form:
- Select Users: Select the users you want to add to the application. Only users you have invited to your workspace will be displayed as dropdown options. A user must accept your invitation to appear in the dropdown options.
- Select Role: Select the role you want to assign to the users.
- Select Portal: If your application has multiple portals, you can choose the specific portal to which you want to add users. The system creates a Default Portal for each application by default. However, if you need to create additional portals for your application, you can navigate to the App Model and select the Portals tab.
After selecting the users, roles, and portals, click the “Invite” button.
The selected users will receive an email with a link to the application they have been added.
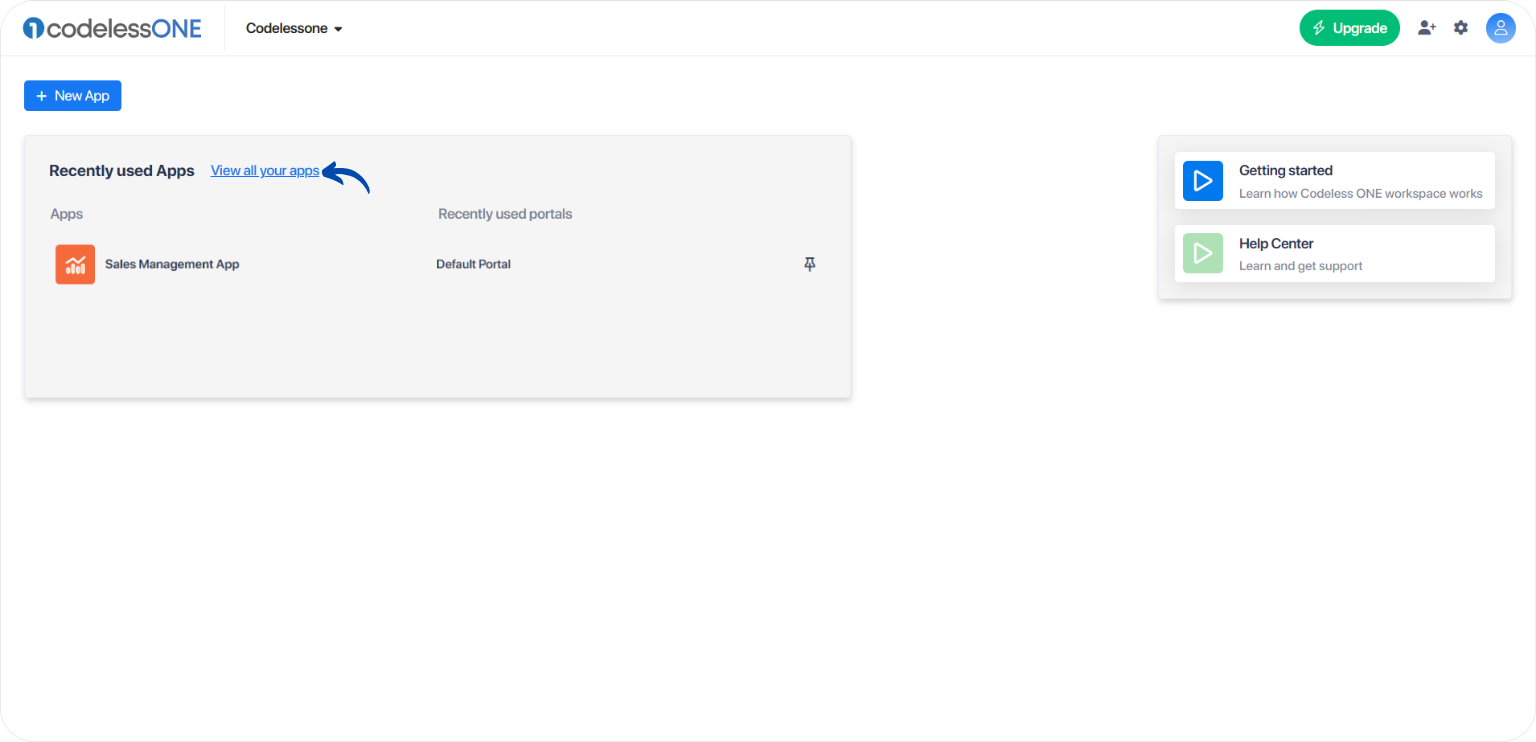
They can also access the application by clicking on “View all Apps” on the homepage of their workspace, where they can see all the applications they have been added to.
Please be aware that when you invite users and add them to a specific role and portal, they will only have access to that role and portal. Thus, it is crucial to ensure that you invite users to the appropriate roles and portals to avoid granting them unnecessary access to areas where they do not need to be.
Step 4: User Information
After adding users to your application, you can view the number of users for each role in the Roles tab. Additionally, you can view user information under the Users tab.
By following these straightforward steps, you can effectively manage access to your workspace applications by adding different users to different applications. This approach allows users to focus on the relevant applications to their work, ultimately improving productivity and enhancing collaboration within your team.